Laser Engraving For Wood | Guide For Beginners
Laser engraving has been the best choice for engraving wood for many years. However, years ago, only people with plenty of money to spare or high end businesses would be able to afford a laser engraver. Thankfully, laser engraving has been developed over the past couple of years in a way that allows ordinary people like me to be able to afford one.
I purchased my laser engraver for less than $600 in December of 2023. And there are actually laser engravers that go for less than $300. Now lets go over how you can laser engrave awesome designs on wood.
How To Laser Engrave Wood
Before you just jump into the world of engraving wood, you need to understand that not all wood are produced equal. What I mean is that some wooden blanks that you might be deciding to laser engrave will need to be prepared differently. Or, the setup you have might have to be changed accordingly.
Here we go:
Step 1: You need a certain type of software to create the designs you will be engraving into the wood of your choice. Three software that makes life easy for us are Lightburn, CorelDraw and Adobe Illustrator.
These types of software will allow you to create different types of drawings, logos, text, or even images. You will be able to upload a photo you took even a minute ago and prepare it to be engraved on your choice of wood. After creating the design you want, you will have a file that is ready for engraving.
Step2: Next on the agenda is placing the piece of wood you want to engrave underneath the laser engraver and align it. This process is easier with some machines like the LaserPecker 1 Pro. I have the Longer Ray 5 20W so I have to manually align the pieces of wood I want to engrave.
Step 3: You will now start the engraving process and watch the laser engraver do its job. This is usually the fun part where you can put your protective glasses on and watch as your engraving comes to life.
Settings for engraving wood
I have done tests on a couple different types of wood and each type usually need different settings for engraving. It's also necessary to know that the type of engraving that you need done will also play a role in the settings you need for your engraving.
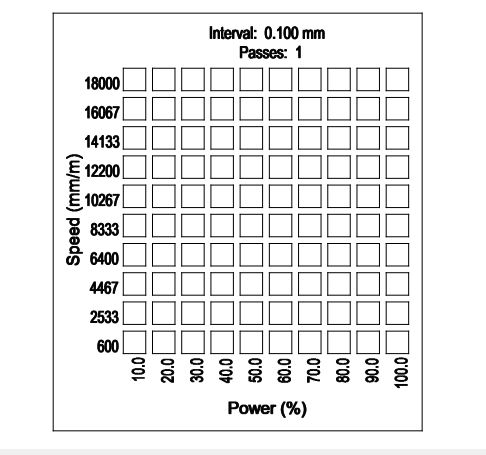
I used a bamboo type cutting board as a test piece and tried to figure out which settings were best to create an engraving. What I did was first create a test sample where all the different speeds and power settings were engraved on the piece of wood. Next, all I had to do was choose which settings looked like they would give me a great outcome.
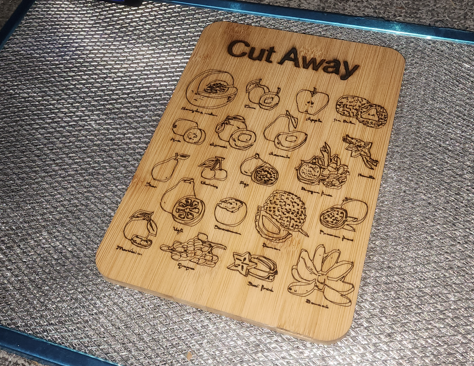
Below are the settings I went with and the outcome of the engraving.
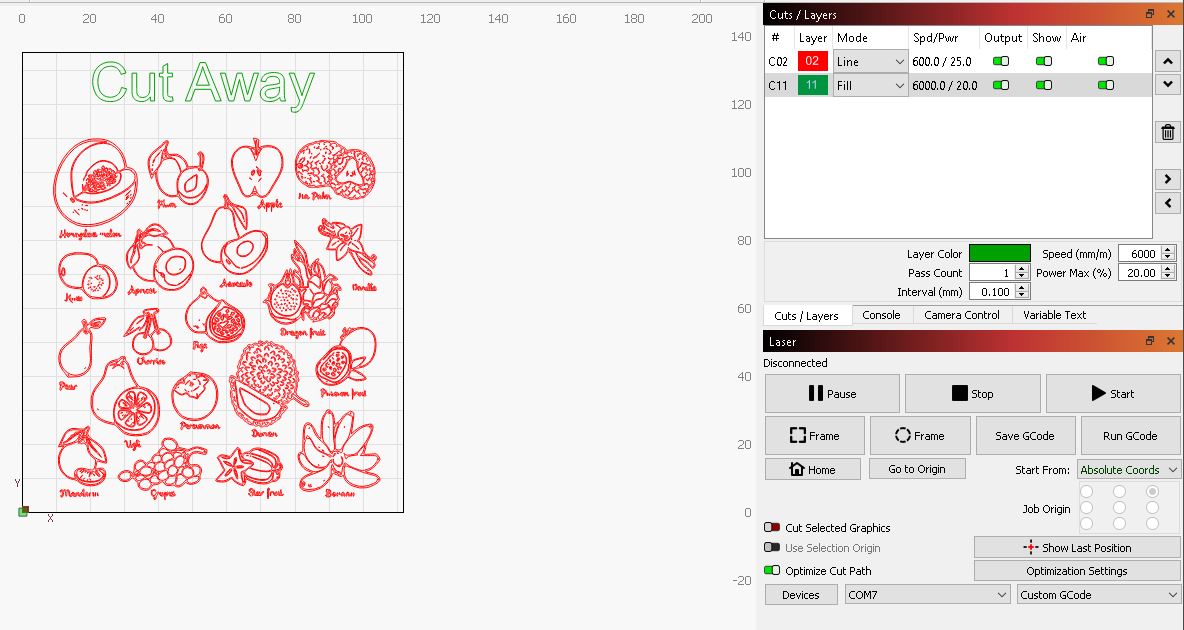
As you can see, I chose to go with 600 mm/m for the Green Cut out of the words and a power setting of 20%. I also chose to use 600 mm/m for the the fruit and a power setting of 25%.
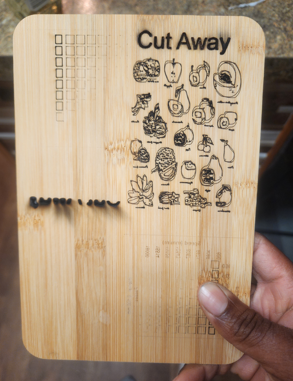
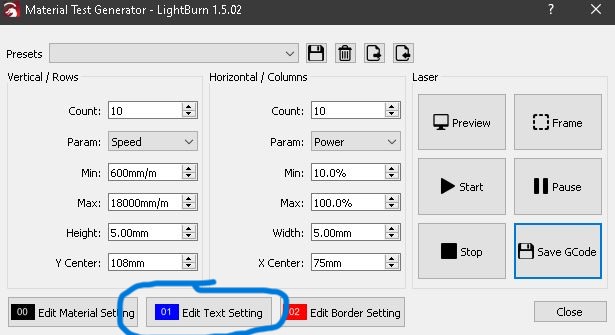
The output of the materials test should look like the image below. However, mine wasn't edited like the way it should have. I should have edited the text settings that are also shown below.
Best wood for laser engraving
- Maple
- Alder
- Cherry
- Hickory
- Purple Heart
- Poplar
- Walnut
- Ash
- Mahogany
Types of wood to avoid
The two types of wood you should avoid engraving are pine and oak. These two types of wood don't have much resin content and also have grain pattern that aren't suited for engraving.
You should also try to avoid pieces of wood that have been altered by adding glue or any other substance like that.
How to handle the smoke and smell?
Whenever you laser engrave wood, there will be some smoke and smell released from the laser beam contacting the surface of the wood. For this reason, I only use my laser engraver in an open area like a garage. I also close all doors and windows so no smell or smoke comes in.
Whenever you start a laser engraving on wood, it's best to have a couple accessories to help. Here are some:
Air Assist: This accessory is awesome as it blows the smoke away from the piece of wood you are currently working on. This will allow the laserbeam to create a cleaner cut or engraving.
Air Purifier: This can be very handy if you have to use the laser engraver indoors.
Enclosure: This accessory is awesome as it will protect your eyes from the laser beam. Some enclosures also come with a section to attach an air purifier or vent.
How to avoid burn marks on your wood?
This is a question that many beginners ask. The simple answer would be to just turn the power settings down and adjust the speed. However, there is more to it than that.
1. Get an Air Assist: An assist is perfect for helping to reduce or eliminates burn marks. Whenever you engrave wood without an air assist, there will be ash that is left close to the sections of your engraving. This will rise the temperature of the areas being engraved and potentially start burning. An air assist reduces this or eliminates this by blowing away all ash.
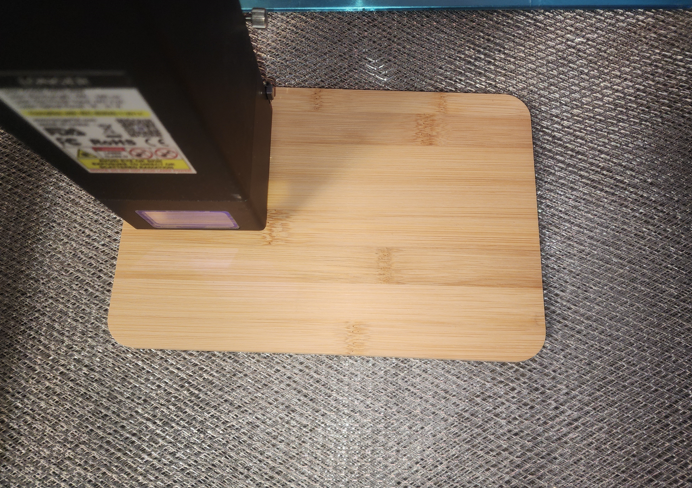
Here is my Longer ray 5 20 watt laser engraver equipped with an Air Assist:

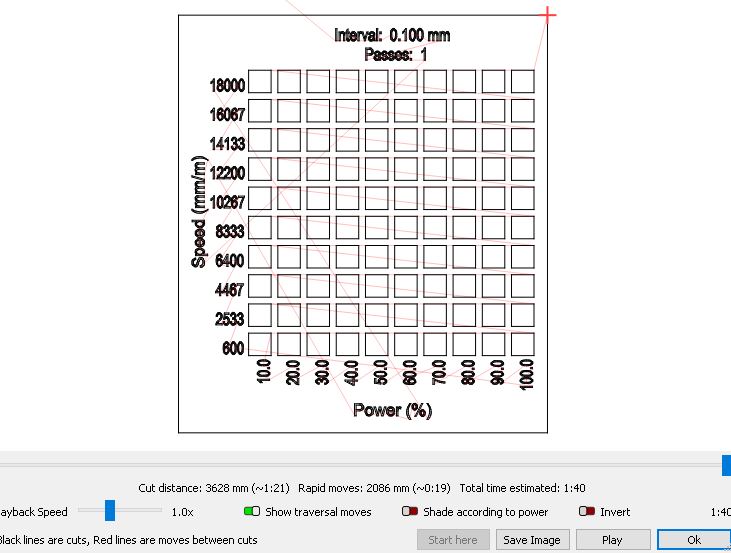
2. Print A Materials Test: This is an option that comes in the Lightburn software. I will place an image below to show you how it looks. With a materials test, you can find the perfect temperature and speed to engrave pieces of wood or just about any other material.
Conclusion
Now you know the best way to engrave wood. If you have any suggestions that I can add to this article, let me know. It felt great writing this article as I've also been enjoying using my own laser engraver. I will be getting new laser engravers to try out and I will definitely be making more tutorials along the way.
Related Articles
-
How to Laser Engrave Leather | Step-By-Step Guide
Can You Laser Engrave Leather?
How to Laser Engrave White Tiles Painted Black?
What Is The Best Low Cost Laser Engraver? My Opinion
How to Laser Engrave Acrylic with a Diode Laser: A Step-by-Step Guide
My Hands-On Review of the Monport 6-Watt Diode Laser Engraver
Laser Etching Glass
Laser Engraving A Photo | Full Guide
How Much Does Laser Engraving Cost
Is Laser Engraving Hard to Learn?
Why is laser engraving so expensive?
WHAT IS A LASER CUTTING MACHINE?
Top 7 Laser Engraving Business Ideas
10 Essential Safety Precautions for Home Laser Engraving Projects
Laser Engraving Cutting Boards | How To
Where To Buy Laser Cutting Materials?
Laser Engraving QR Codes
What Is DPI In Laser Engraving
How Much Is A Laser Engraving Machine