Laser Engraving Slate Coasters | FULL GUIDE
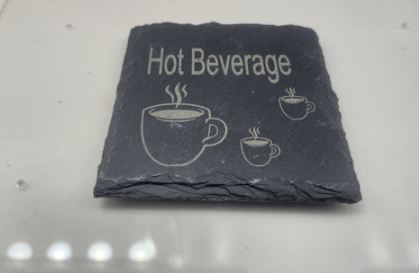
Step-by-Step Guide to Laser Engraving Slate Coasters
Laser engraving slate coasters has been fun and rewarding as it's not as involved as some of the other projects that I have taken on lately. Whether you’re personalizing a gift or crafting something custom for your business, you might want to give slates a try. In this guide, I’ll be using a diode laser engraver. The Monport 6 watt diode is the laser engraver I will be using for this small project.
Let’s get started!
Items Needed for Slate Engraving
- A diode laser engraver (e.g., Monport 6 watt diode).
- Slate coasters (I get mine at Walmart).
- Design software (I use MPlaser, Lightburn, and Imag-R).
- A soft cloth for cleaning.
- Stone sealant(this is optional)
Step 1: Gather Your Materials
First, you’ll need high-quality slate coasters. They come in various shapes like circular or square and are available online or at local craft stores. I get my slate coasters from Walmart. I have tried getting them from different Walmarts but I came to notice that only a few of the Walmarts that I visit actually have them in stock.
Here is a picture of the packaging it comes in.
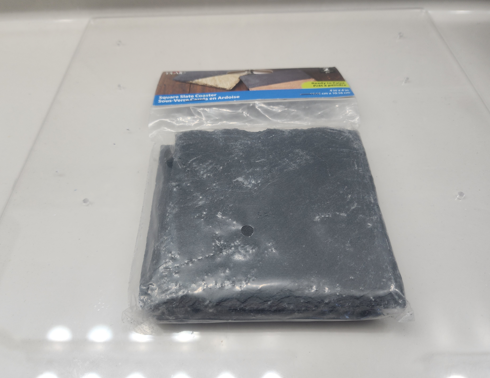
Ensure your coasters have a smooth, consistent surface for the best engraving results. The ones I get from Walmart kind of have rough outer edges but I guess that gives it more of a natural look.
Step 2: Setup Your Machine
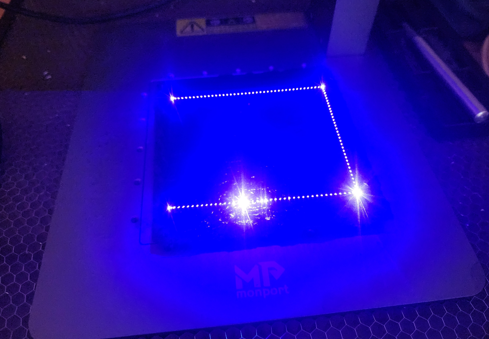
My machine is very easy to set up. Well at least the Monport laser I currently have is. I can easily move it around because of how small and lightweight it is. Here you can see I just have it placed on a simple table with the coaster ready for engraving.
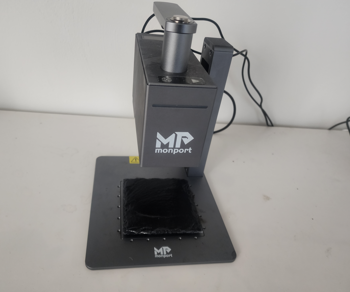
You want to ensure that anywhere you setup your machine is safe. This means you should try to not have your machine setup in any room that you will be staying for extended periods of time. This is due to the laser engraving process releasing toxic fumes while operating. This is usually where a fume extractor comes in handy.
Your machine should be set up on a flat surface and away from anything that is flammable. Having a fire extinguisher while working with laser engravers is also a good idea as you never know what might happen.
- Position the Coaster: Securely place your slate coaster on the engraving bed. Use alignment tools or markers for precision. Many different engravers have positioning clamps to help with alignment. The laser engraver I am currently using allows for easy alignment.
Here is an example:
- Import the Design: Upload your design file into the engraving software and adjust its size to fit the coaster. The coasters I use are all 4 inches by 4 inches and I size my images in the software known as Imag-r before I even import it to other software like lightburn.
- Adjust Settings: Select "Norton White Tile Painted Black" or a similar material in the software’s material library.
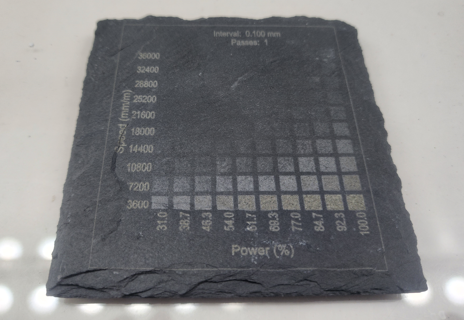
Optional: Experiment with speed and power settings to achieve unique color variations on the slate. Below you can see the test that I ran first.
Step 3: Prepare Your Design
This is where the fun begins! I love creating different designs for slate, from simple designs to complex ones. I am definitely not the best at this, but I have learned to just do what makes me satisfied at the end of each engraving. Here are some ideas for slates:
- Monograms or initials for special occasions.
- Quotes and sayings from the bible or your favorite books.
- Logos or brand names of companies you might work for.
- Intricate decorative patterns such as the Ying Yang pattern.
- Images of animals like a lion or tiger.
Make sure your design is in grayscale for the best result on slate. I always choose Norton White Tile Painted Black on the software known as Imag-r.
You can use design software like Adobe Illustrator or free options like Inkscape to fine-tune your designs.
The settings i used for the slate in this article is as follows:
Speed: 7200mm/min
Power: 100%
The machine I used is the Monport 6 watt laser engraver.
Step 4: Begin Engraving
With everything set, it’s time to start the engraving process:
- Double-check your alignment and settings. This is especially necessary as you really only get to do this once. Especially if you only have one piece of slate coaster left. This is why having extra material to test on is always a must.
- Start the engraving process.
- Watch the laser as it accurately engraves your design onto your slate.
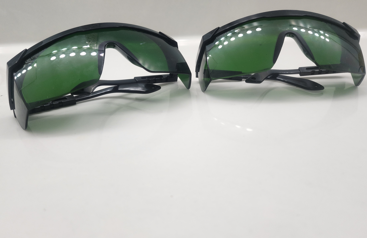
Safety Note: Always wear protective glasses and ensure proper ventilation when working with lasers. Here is an example of protective eyewear below:
Step 5: Clean and Protect
Once your engraving is complete, it’s time to clean up:
- Wipe Down: Use a soft, damp cloth to remove dust or any residue left over.
- Seal the Coaster (This is Optional): Apply a stone sealant to enhance the design and protect the surface. This step isn’t necessary, but it can give your coaster a polished finish and improve durability.
Pro Tip: If you’re planning to use these as drink coasters, sealing can help prevent staining.
Ready to Show Off Your Work?
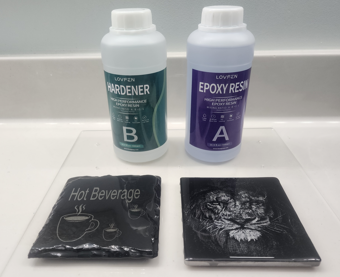
I usually finish my slate coasters off with epoxy to give it a shiny look to it. You have to admit that the finished product looks way better when epoxy is added. However, when epoxy is added, water or liquid will usually just slide right off. Adding epoxy is really just for show and not really practical.
I want you to have fun experimenting with different designs, and don’t forget to share your projects with me. I will soon be adding a section on this blog where I showcase different users designs.
Related Articles
-
How to Laser Engrave Leather | Step-By-Step Guide
Can You Laser Engrave Leather?
How to Laser Engrave White Tiles Painted Black?
What Is The Best Low Cost Laser Engraver? My Opinion
How to Laser Engrave Acrylic with a Diode Laser: A Step-by-Step Guide
My Hands-On Review of the Monport 6-Watt Diode Laser Engraver
Laser Etching Glass
Laser Engraving A Photo | Full Guide
How Much Does Laser Engraving Cost
Is Laser Engraving Hard to Learn?
Why is laser engraving so expensive?
WHAT IS A LASER CUTTING MACHINE?
Top 7 Laser Engraving Business Ideas
10 Essential Safety Precautions for Home Laser Engraving Projects
Laser Engraving Cutting Boards | How To
Where To Buy Laser Cutting Materials?
Laser Engraving QR Codes
What Is DPI In Laser Engraving
How Much Is A Laser Engraving Machine
