Laser Engraving on Painted Canvas
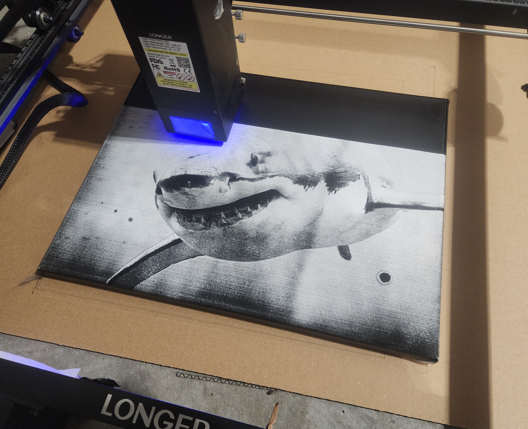
Mastering Laser Engraving on Painted Canvas
Laser engraving on painted canvas opened my eyes to what's really possible with my laser engraver, mixing fine art with technology. You're able to create awesome paintings with only software and the knowhow of how to operate a laser engraver. I have seen many people using their laser engravers in ways I never knew possible but for those who have never done laser engraving on canvas, follow along as I go through the full process of laser engraving painted canvas.
Materials and Preparation
Here I will go over the required materials needed and also the prep work that needs to be done so that you have a gameplan in mind.
Essential Tools and Equipment To get started, gather these items:
- Laser engraver
- Canvas
- Acrylic or spray paint ( I have used both in different projects)
- Image editing software (I mainly use Lightburn)
- Protective gear (Some machines have a protective covering)
- Air filter (Optional if in an enclosed area)
- Cleaning supplies (A simple damp rag works great)
Step-by-Step Guide
1. Choose and Prepare Your Canvas
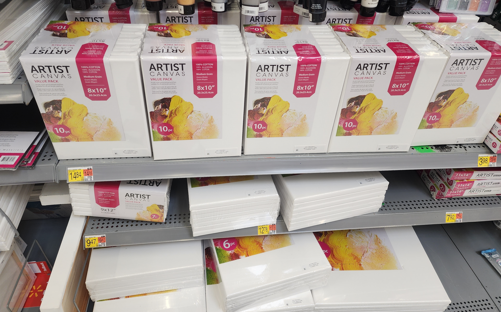
This is the part where you will have to choose a canvas that will fit the working area of your laser engraving machine. I have two laser engravers and one has a working area of 4" by 4" and my other machine has a working area of roughly 15.7" by 14.4".
My larger machine hasn't been used a lot lately due to me using my more portable and smaller machine. However, whenever I want to do any type of large engravings, I have to go back to my larger machine.
The canvas I am using in this project measures in at 355mm by 275mm. I get these canvases at dollar tree for $1.33 each. You can also get these canvases at Walmart as you can see below.
2. Paint the Canvas
This is where you will now need to choose how you will be painting your canvas. You have to think about the outcome you want. I sometimes use only one base color but sometimes I use more than one depending on the type of image I will be engraving.
Let's go into the process I go through here.
- The Base Layer: I apply a base coat of acrylic or spray paint. I usually use light or neutral colors for the bottom layer if I plan on layering multiple colors. Sometimes I use multiple colors as a single base color to create an amazing effect. Look at the image below to get an idea of what I am talking about. In the example I used 4 different colors of acrylic paint that I picked up from the dollar store.
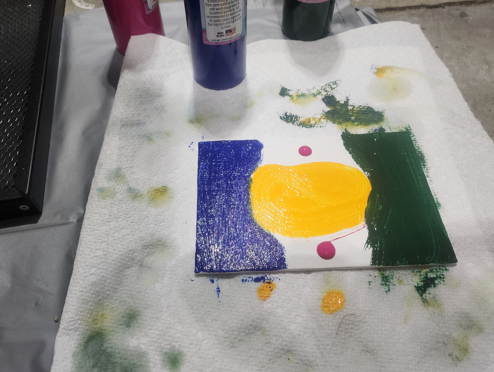
- Top Layer: Choose a contrasting color, such as black or dark blue. I usually only apply one good layer of black paint as the top layer. However, if for some reason that the base laser is coming through the top layer, then I would apply a second but much lighter second top layer.
Here are some of the acrylic paint that I purchased from a local dollar store called Dollar Tree.
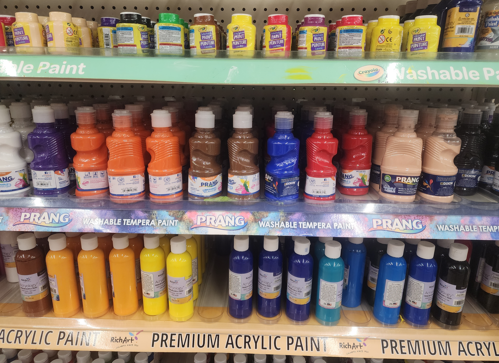
Next is to allow the painted canvas to sit and dry for a couple minutes or hours depending on the recommendation of the product's manual.
Sometimes when I cannot wait for my canvas to dry I will use a heat gun to speed up the process. I simply turn my heat gun on and run it over the canvas for about 2 minutes while testing to see if is actually dry.
3. Secure the Canvas
You can use masking or painter’s tape to secure the canvas to the engraver’s work bed. This prevents movement from airflow or vibrations during engraving. This is a tip I would usually give when engraving items like business cards or other lighter materials.
What I have come to realize is that simply adding double sided tape to at least two different sections of your canvas or other lighter materials is adequate to keep it in place. I might be trying to use only one soon and see how that works. All you have to do is add a piece or two of double sided tape to the back side of your material then place it in the location you want.
4. Prepare Your Design
Use software like Lightburn or Imag-r.com to convert your design into grayscale or black and white. Adjust brightness and contrast for clarity.
This is where I always try to use software that I am comfortable using. The software I try to always use is one called Imag-r that is web based. Here is a screenshot of the options you will have and I will go over what each option offers.
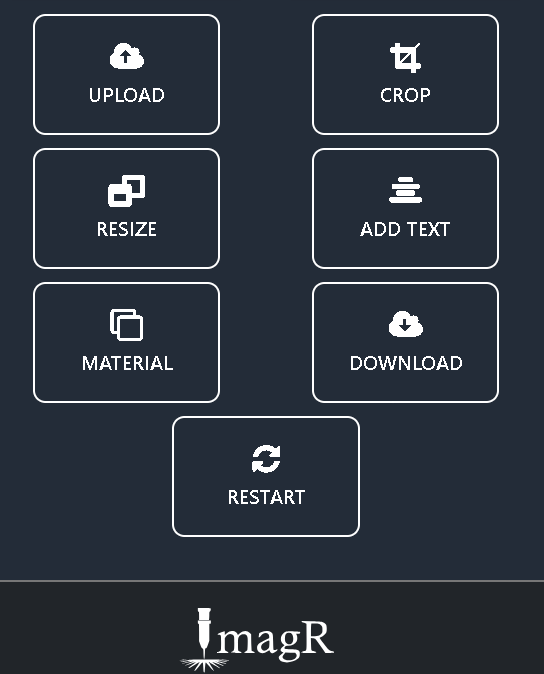
- Option 1. The first option is the Upload option. You will choose this option to upload the image you want to edit.
- Option 2. The second option is Crop. You choose this option to do exactly what it says, crop your uploaded image. You might want to laser engrave a certain part of an image only and that is where cropping will help by getting rid of parts of an image.
- *Option 3. Next you have resize. This is one of the options you will be using most. I use this option to set the image to the exact size of the canvas I will be laser engraving on. For this example, the image was resized to a height of 275mm and a width of 355mm.*
- Option 4. You can use the add text option if you want but I never use it.
- Option 5. Material setting is where the most fun begins. This is where you will choose the type of material you will be laser engraving on. I click on Material then next I click on the option that say NORTON, and then I choose Norton White Tile Painted Black. I know we are not painting on tile but it works just the same for canvas.
- Option 6. After you have finished editing your image, it is now time to download your image. You will now choose the option that says Download.
Test Alignment: Use the engraver’s preview feature to ensure the design is centered and aligned correctly. Almost all laser engravers will allow you to test your alignment.
5. Set Laser Parameters
This is where you will set the parameters for you laser engraving project. Each material will require a different type set of parameters. For instance, To laser engrave on wood will need higher power and lower speed to cut or engrave while canvas would need lower power and and higher speed top complete the same job.
- Speed and Power: The settings you choose will give different results. The screenshot below will show the settings I used for the main image in this article. I didn't use any other software to edit the engraving of the great white shark. All I did was use Lightburn to create a negative of the image I wanted to engrave. I have been laser engraving for over a year and have learned the different power and speed settings for my laser engravers so I can always have a near perfect engraving every time.
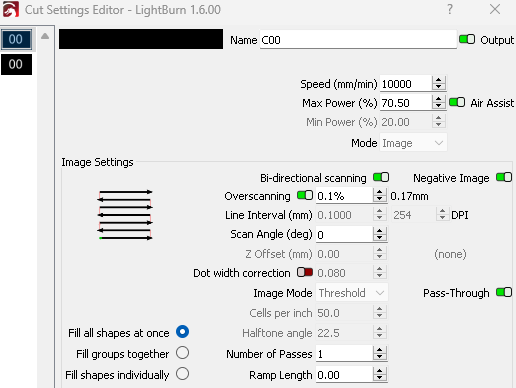
Lightburn gives you the option to save each setting you have for different materials in a section called library. In library, you can save the different settings you will be using more than once.
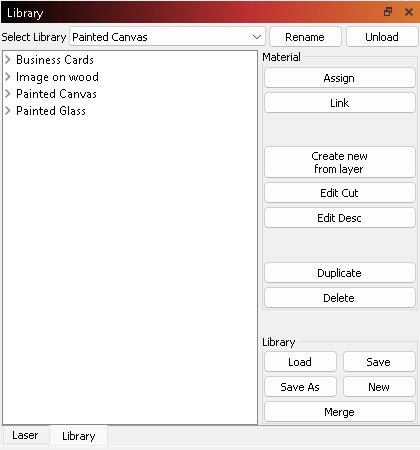
As you can see above, I have 5 main types of items that I engrave. Business cards, Wood, Canvas, and glass. Whenever I need to do any of these types of materials, all I would have to do is go to the Library section and choose the settings I know works.
6. Test Engraving
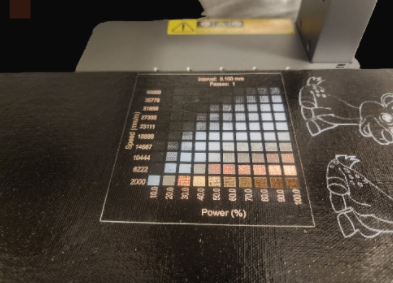
Scrap Material Test Piece
Run test engravings on a spare painted canvas to find the correct settings for your engraving to come out the way you want it to.
I run tests on all the different materials I will be engraving on. It is always best to have spare scrap pieces to test on.
Adjust Your Settings
Now it's time to set your power and speed setting to the values that will work best.
7. Start Your Engraving
After completing all the steps, now it is time to start the laser engraver. Depending on the type of laser engraver you have you might have a different startup process. Just follow your specific machine process and get the engraving started.
8. Finishing Touches
- Clean the Canvas - After your engraving is complete, you now need to lightly brush off any paint residue that were left over from the engraving process. After that is done, use a damp cloth (not wet cloth) to wipe the painting off.
- Seal (This Is Optional) - Next you can take the extra step to seal your engraving. You can use a clear coat to protect the engraving.
Conclusion
Laser engraving on painted canvas is one of my favorite things to do with my machines. With the right preparation, settings, you can produce breathtaking pieces that will have you smiling at the end of each of your projects.
Happy engraving!
Related Articles
-
How to Laser Engrave Leather | Step-By-Step Guide
Can You Laser Engrave Leather?
How to Laser Engrave White Tiles Painted Black?
What Is The Best Low Cost Laser Engraver? My Opinion
How to Laser Engrave Acrylic with a Diode Laser: A Step-by-Step Guide
My Hands-On Review of the Monport 6-Watt Diode Laser Engraver
Laser Etching Glass
Laser Engraving A Photo | Full Guide
How Much Does Laser Engraving Cost
Is Laser Engraving Hard to Learn?
Why is laser engraving so expensive?
WHAT IS A LASER CUTTING MACHINE?
Top 7 Laser Engraving Business Ideas
10 Essential Safety Precautions for Home Laser Engraving Projects
Laser Engraving Cutting Boards | How To
Where To Buy Laser Cutting Materials?
Laser Engraving QR Codes
What Is DPI In Laser Engraving
How Much Is A Laser Engraving Machine