How to Laser Engrave White Tiles Painted Black?
How to Laser Engrave White Tiles Painted Black
Laser engraving on white tiles has become by favorite way to create striking, high-contrast designs that stand out. I have recently started doing more and more of these amazing engravings and I feel as though I will not be able to stop. Whether you're a beginner or you have been engraving for some time, this guide that I have put together will walk you through every step of the process. I will offer tips and precautions to take while you follow along.
Why Choose Black-Painted White Tiles?
Reasons why ceramic tiles are ideal for laser engraving:
- They offer High Contrast: The black paint burns away during engraving, revealing the white surface for the best looking outcome.
- Tiles are Affordable: Ceramic tiles are cost-effective and widely available. I paid roughly US$19 for 40 tiles. That's an average of roughly US$0.47 per tile. It's hard to beat that cost.
- They are Durable: The engraved designs are long-lasting and scratch-resistant. Especially if you add an extra clear coat for protection. I usually leave my engravings without a clear coat.
Tools and Materials You’ll Need For The Project
Before you get started, you will need the following:
- White Ceramic Tiles – Smooth and glossy tiles work best. I get mine from hardware stores like Lowe's or Home Depot. The ones I used in this guide were purchased from Home Depot.
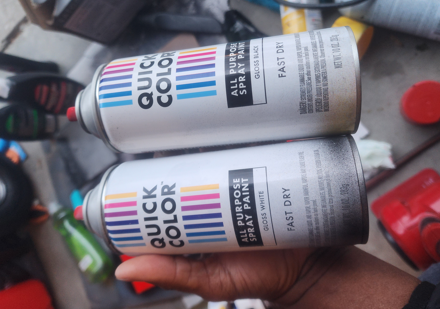
- Matte or Gloss Black Spray Paint – Try to use high-temperature-resistant or matte or gloss finish paint. The spray paint that I use are from Walmart and cost about $6 per can.
- Laser Engraving Machine – Diode, CO2, or fiber lasers all work, but diode lasers are the most common ones used. I have two different machines that I use for these projects. However, the one I mainly use now is the smallest of the two which has a working area of 4 inches by 4 inches.
- Rubbing Alcohol – For cleaning residue before and after engraving.
- Design Software – I use software like LightBurn or LaserGRBL to create and edit my designs.
- Safety Gear – Safety goggles, gloves (optional), and a well-ventilated workspace.
Step-by-Step Guide to Laser Engraving White Tiles Painted Black
1. Prepare the Tiles

- Cut tiles if necessary
I had to cut my tiles to size due to the fact that the machine I chose to use can only engrave on tiles 4 inches square.
-
Clean the Tile

Remove any dirt, dust, or grease from the surface using rubbing alcohol. I learned this the hard way after I couldn't get the black spray paint to stick evenly. Some of the paint would sorta bubble in some areas while looking perfect.
- Apply Paint
Spray a thin, even layer of matte or gloss black paint. Allow it to dry for at least 24 hours to ensure full adhesion. I usually use a blow dryer or heater to speed up the process.
You can sometimes add a white bottom layer of spray paint to bring out a much brighter design. With the tiles I recently purchased, I haven't had to add any white layer.
2. Design Your Artwork
- Create or download a high-contrast black-and-white design. It's best if you use vector images. I have been using just any image to create my designs whether they are in black and white or in color. I have seen more and more people using AI design software to create amazing designs lately and I will be trying some of those said software soon.
- Resize the design to fit your tile dimensions using software like Lightburn or Imag-r. I sometimes use Imag-r if I am editing photographs. Here is how Imag-r looks.

- Adjust the settings to invert the image if needed (black areas will engrave white). One good tip I can give you if you decide to use Ima-r is that if you are using Lightburn to do the engraving, be sure you have invert turned off. I made this mistake and couldn't figure out what I was doing wrong.
Here is how the settings look.

You get to this settings by double clicking on the image option on the right side. Here is an example of that:

Now these images are just for use as an example. These are not the speed or power that I ran those engravings at.
3. Set Up Your Laser Engraver
You want to secure the tile on the engraver bed to prevent any movement. I never really had to do this as tiles are heavy and don't move around even if you have air assist running. One material that I do have to secure most of the times is metal business cards. Metal business cards can move around if you have air assist turned on.
Perform a test engraving on a spare tile to fine-tune your settings
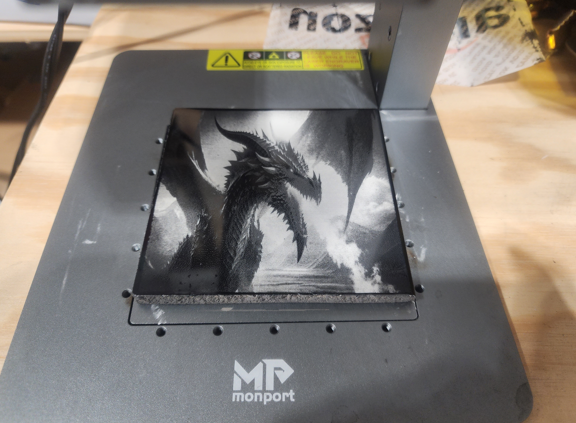
I usually run multiple test before I actually run the final engraving. This is important especially when you are working with a new type of material. To get the perfect engraving of the dragon in this article, I think i ran about two or three tests.
After running the tests, you will get an idea of whether or not you need to adjust any speed or power settings. You might even need to redo your original image to get the correct shade or darkness in certain places.
4. Engrave the Tile
Now it's time to start the engraving process and monitor the laser to ensure no interruptions occur. One rule of thumb I see many people in the hobby give is to never leave the laser engraver unattended. Well I think laser engraving tiles is more safe than laser engraving cardboard or other types of flammable materials. I would never leave my laser engraver unattended if I am laser engraving cardboard or other flammable materials.
5. Clean Up
Once complete, take a piece of paper towel and wipe the engraving off before handling. Avoid using abrasive materials to prevent scratching the tile. You should now have an amazing looking engraved tile.
Advanced Techniques
-
The Norton White Tile Method:
Instead of painting tiles black, spray them with titanium dioxide mixed with 70% alcohol. The laser creates dark designs by reacting with the titanium dioxide. I will doing an article and video on this procedure soon. It is becoming one of my favorite ways to engrave on white tiles.
-
Color-Fill Engraving:
After you finish your engraving, you can fill the design with epoxy resin or acrylic paint to add vibrant colors. I am yet to try this due to time restraints. I will however, I will certainly be trying this
-
Multi-Layer Designs:
Apply two colors of paint (e.g., black and gold) and engrave at different depths to reveal intricate colors at different layers. This method will need lots of practice to get the depth right. After you have your settings saved, it will be easy for you to complete multiple projects easily.
Frequently Asked Questions
What laser type is best for engraving tiles?
A diode laser is my favorite choice as it is ideal for beginners due to its affordability and compatibility with different types of materials. The cost alone will get new people in the hobby much easier. I have two diode laser engravers and i spent less than $1200 in total for both.
Can I reuse a tile with engraving errors?
Yes! You can reuse a tile by sanding off the old paint. You would then need to reapply it, and try again. I don't remember having to ever throw out any old tiles. I always reuse the messed up ones in some type of project.
How do I clean engraved tiles?
You clean engraved tiles by using a soft, damp cloth with mild soap if possible. I mainly use a damp paper towel. Avoid using any type of harsh chemicals that might affect the engraving. It would be really sad if after you complete an amazing project it gets ruined in the cleaning phase.
Conclusion
Laser engraving white tiles painted black is very easy once you get the hang of it. By following the steps that I have outlined in this article and experimenting with different settings and techniques, you can surely create amazing tile engravings. These are perfect for photo gifts as most people are used to photos being on some form of plastic or fabric. Having a photo engraved on painted tile will surely open the eyes to the person you created it for.
If you're ready to start your engraving journey. Read some of the other articles I have listed below.
Related Articles
-
How to Laser Engrave Leather | Step-By-Step Guide
Can You Laser Engrave Leather?
How to Laser Engrave White Tiles Painted Black?
What Is The Best Low Cost Laser Engraver? My Opinion
How to Laser Engrave Acrylic with a Diode Laser: A Step-by-Step Guide
My Hands-On Review of the Monport 6-Watt Diode Laser Engraver
Laser Etching Glass
Laser Engraving A Photo | Full Guide
How Much Does Laser Engraving Cost
Is Laser Engraving Hard to Learn?
Why is laser engraving so expensive?
WHAT IS A LASER CUTTING MACHINE?
Top 7 Laser Engraving Business Ideas
10 Essential Safety Precautions for Home Laser Engraving Projects
Laser Engraving Cutting Boards | How To
Where To Buy Laser Cutting Materials?
Laser Engraving QR Codes
What Is DPI In Laser Engraving
How Much Is A Laser Engraving Machine